
Dec 31, 2014
Monthly Mani Favorites: December 2014
So after seeing me post Holiday Nail Art for a month, I am pretty sure you all had lot of ideas for which nail art to wear this Holiday Season. So now its time to choose your favorite Holiday Nail Art out of all of them. Here are some of my favorites from the Holiday Season. Which one's are your favorite? Let me know in the comments section below. Hope you all had a wonderful Holiday Season.

Dec 25, 2014
Holiday Series: Christmas Sweater Nail Art
Beautiful or Ugly…its upto you to decide how you think Christmas sweaters are. I like some designs and decided to recreate that on my nails. So here it is my Christmas Sweater nail art. Enjoy!!!


Dec 22, 2014
Holiday Series : Candy Canes and Christmas Tree
With Holiday Season on and Christmas just around the corner, I am sure you all have your Christmas trees up and decorated. So have I, just on my nails ;) . So today's nail art is of Candy Canes and Christmas Trees. Hope you love it.


Dec 19, 2014
Holiday Series: Snowflakes
Snowflakes!!! There is something about them which makes me like everything about them. From snowflake jewelry, cutlery, patterns, wrapping paper, I love everything about them. So I decided to try my hand at stamping by buying a snowflake stamping plate from BornPrettyStore and trying my hand at some more stamping. All these pretty snowflakes are created from the images used on the stamping plate. The base polish is OPI’s The Spy who loved me and I used OPI’s My Boyfriend Scales the Walls to create the stamped snowflakes. Hope you all Enjoy it. See my free-hand snowflake nail art from last year here.
To get 10% off your order from BornPrettyStore use coupon code QANX31


To get 10% off your order from BornPrettyStore use coupon code QANX31


Dec 15, 2014
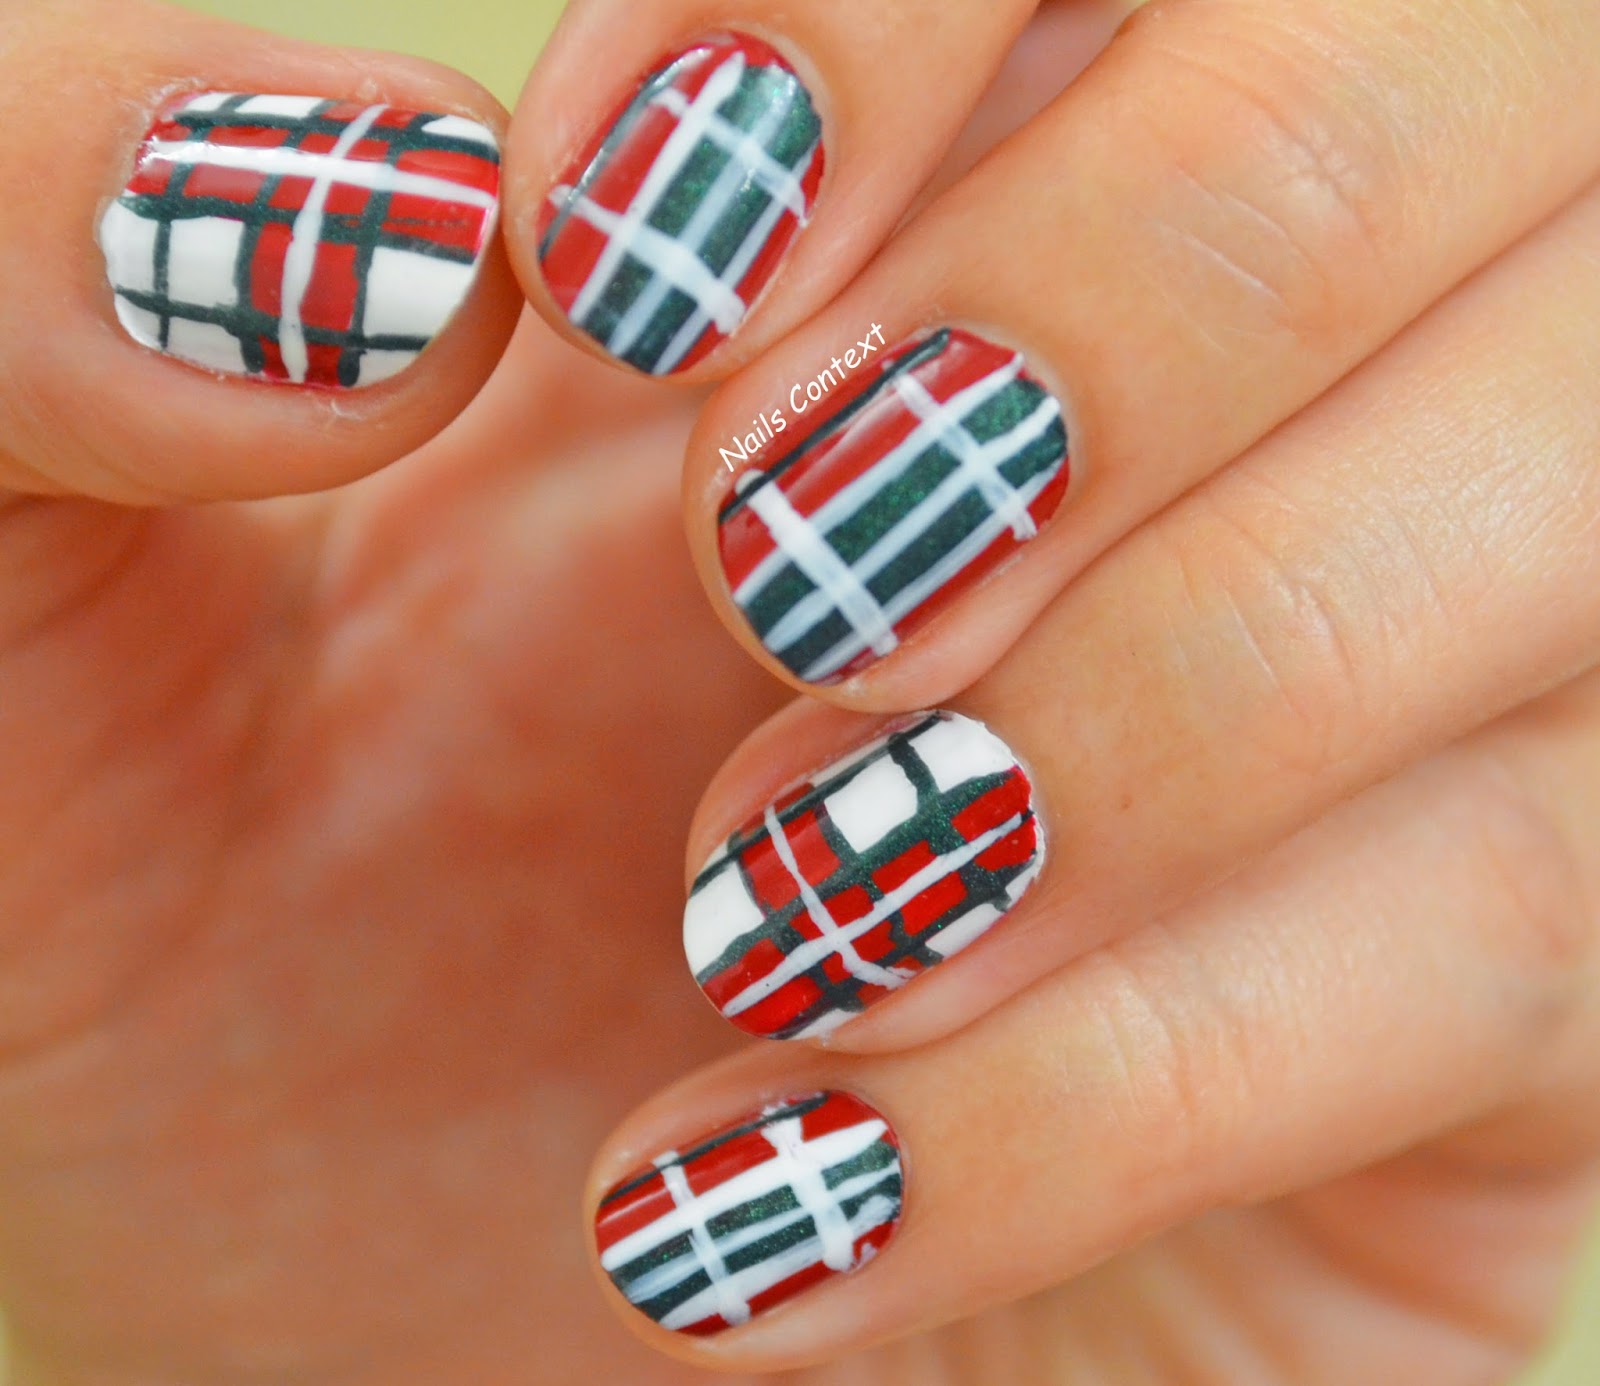
Holiday Series: Christmas Plaid Nail Art
Today I am sharing with you all my Christmas Plaid Nail Art. This one reminds me of all the pretty Christmas Plaid fabric that you see around, during holiday season. Hope you all love it. Enjoy!!!


Dec 12, 2014
Holiday Series: Feeling Festive
Hello Friend's. Another day during the Holiday Season and another Holiday Nail Art. This one is very festive looking and I used glitter placement technique to create this one. The polishes used are Chanel's Dragon and on top of it using SinfulColor's Watch It Shine, I added the diamond glitter placement . What do you all think? My Husband thinks it looks more like a Indian wedding than Holiday season. Do you agree with him?
See other mani's using the same glitter here and here.


See other mani's using the same glitter here and here.


Dec 9, 2014
Holiday Series: Winter Wonderland
Hello friends, time to step into my winter wonderland this Holiday Season with some Christmas Candy in it ;) I created it using normal nail polishes like Butter London's Fruit Machine and Cotton Buds. The house is made from Urban Outfitter's Flip Flop, windows/doors are made from Revlon's Plum Seduction and the candy cane red is Chanel's Dragon.
SO, what do you all think ? Would you like to step in my Winter Wonderland.


SO, what do you all think ? Would you like to step in my Winter Wonderland.


Dec 5, 2014
Holiday Series: Mistletoe
Sharing with you all today, another one of my Christmas Nail Art. It's free-hand painted Mistletoes. It looks very Christmassy, as I have been told by my friend's. I love how the red glitter looks on the red nail polish. It's OPI's Gettin' Miss Piggy With It over OPI's The Spy Who Loved Me, one of the "Holiday-appropriate" shades that I have.
So what do you all think? A Kiss-deserving nail art? :)


So what do you all think? A Kiss-deserving nail art? :)


Dec 3, 2014
Tutorial: How to remove glitter polish easily
It's Holiday Season and what do we all love the most in this Season on our nails? Well, glitter polishes of course? The sparkles, the bling, the pretty shades it’s all good until the polish starts to chip off and it’s time to remove the glitter polish from your nails. As much as I love putting the glitter polish on, I hate removing it because its always hard to remove. Those tiny sparkly glitter particles, that looked so lovely a few days ago become the object of concern now, as they refuse to leave your nails. So while reading some online article one day, I discovered this easy trick on how to remove glitter polish easily without hurting your nails. I decided to try it myself, before sharing it with you.
For this technique, you will need the following:
1. Nail Polish Remover
2. Cotton buds
3. Aluminum Foil (can be found easily in any Grocery store.)
Step 1. Take cotton bugs for each finger and soak them with nail polish remover.
Step 2. Apply cotton buds soaked in nail polish remover on every nail covered with glitter nail polish.

Step 3. On fingers covered with cotton apply the aluminum foil and cover the whole finger tip.

Step 4. Wait for 5-7 minutes and then take out the foil and then the cotton bud. The glitter polish should have come off by now and if a little of it is remaining here and there, just remove it with more nail polish remover.

Easy Peasy isn't it? Don't agree? Try it yourself with your favorite glitter polish this Holiday Season.
Dec 1, 2014
Holiday Series: Winter Woods
It’s Holiday season and Christmas is just around the corner, so I decided to start sharing my Holiday nail art here. So here is my first Holiday nail art of the season...Winter Woods. This is my interpretation of how the woods look like in (almost) dark when it starts to Snow. I created this free-hand using normal nail polishes from some of my favorite brands (If you want specific details on nail polish leave a comment below). So what do you all think? like my first Holiday nail art of the season?


Stay tuned for more Holiday Nail Art.


Stay tuned for more Holiday Nail Art.
Subscribe to:
Posts (Atom)